This Page Table of Contents
| Table of Contents |
|---|
This Page Tree
| Page Tree | ||
|---|---|---|
|
Latest Windows Installation Video
Video of Latest Windows Installation Process July 2022
Click on the Windows button
...
to download the CadEnhance tools. Download the selected file.
The page shown below can be found on the Downloads page at https://www.cadenhance.com/downloads
Execute the self extracting install file
Click open or show in folder (we will show the show in folder steps)
Double click to execute the downloaded file
...
Allow the operation to proceed
...
In Case of Security Warning:
If a Security Warning pops up, you will need to take steps to override the warning and continue the installation process
Click the More info Link
Then Click Run Anyway and goto the next step
Start the Installation process
...
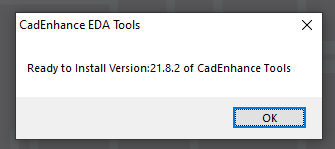
Click on "OK" button in "CadEnhance EDA Tools"
Extract the archive
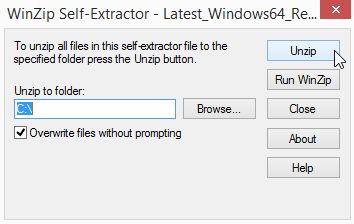
Select the Folder to Install to
The default installation directory is C:\ which works well for many users, especially for a demo.
The user may wish to use the Browse... button to pick a different directory to install the tools to.
For instance Our C:\ Drive is an small internal SSD, So we actually install the tools on our D:\ Drive where we have much more room and we like to use the MultiVersion Installation
Multi Version Installation
It can be very useful to install each version of the tools in its own directory so that users can revert to an older version of the tool if necessary.
At CadEnhance we use this technique so that we can easily switch to a customers current tool version to try and reproduce an issue they might be having.
Click here to read more about that process: Installing Multiple Versions of CadEnhance Tools
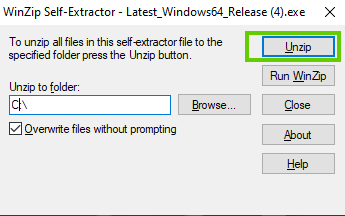
Extract the Tools to the Selected Folder with The Unzip Button
Click on "Unzip" button to unzip to selected directory.
...
Finish the operation
...
For the v21.8.2 release with the NEW_SDL_EDITOR files, there should be ~153 files extracted
Click on "OK" button
Close the Self Extractor
Click on "Close" button
Then Click close to close the self Extractor
Installation File Directories
Your unzipped files will be located in the
...
Click on "V21.5.1" so you will be able to find the individual tool executable files.
Located in the license folder is the "License_Request" text document.
Email the "License_Request" text document back to boleary@cadenhance.com.
...
Top Level Folder you chose.
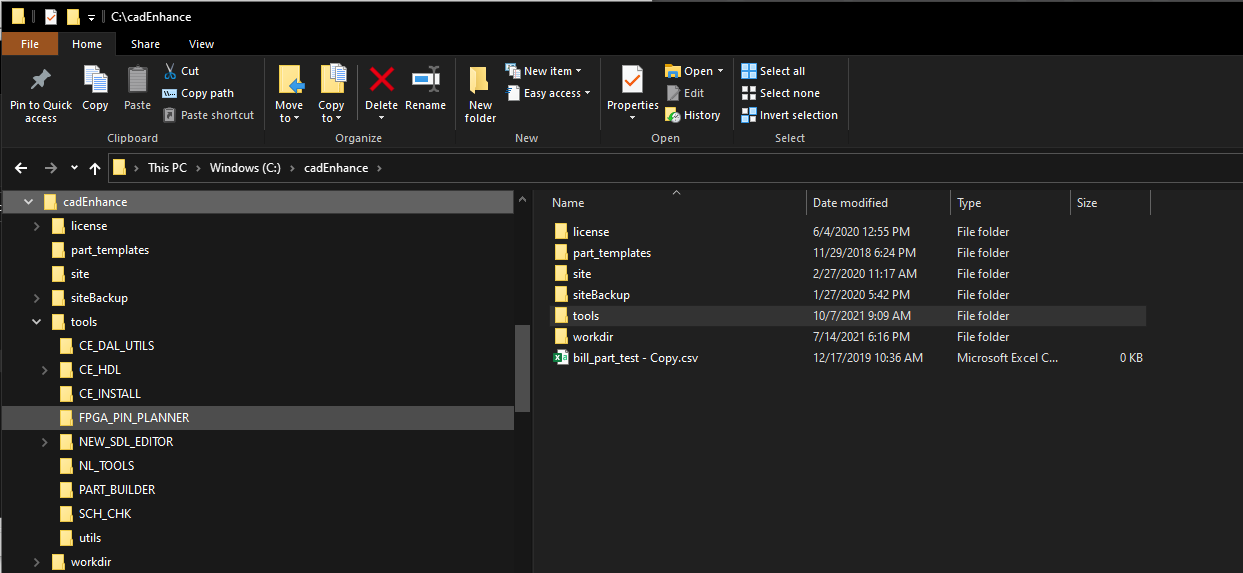
CadEnhance Directory Structure
The CadEnhance Directory structure will look like this:
CadEnhance\Tools Directory Structure
And the CadEnhance\tools directory will look like this:
Individual Tool Executable Files
The individual tool executable files will be located in the following locations..
for historical reasons the NetBom executable is actually called nl_tools.exe
| tool | directory location | executable name |
|---|---|---|
| netBom | INSTALL_DIR\cadEnhance\tools\NL_TOOLS | nl_tools.exe |
| partBuilder | INSTALL_DIR\cadEnhance\tools\PART_BUILDER | part_builder.exe |
| schChk | INSTALL_DIR\cadEnhance\tools\SCH_CHK | sch_chk.exe |
| ceHDL | INSTALL_DIR\cadEnhance\tools\CE_HDL | ce_hdl.exe |
| FpgaPinPlanner | INSTALL_DIR\cadEnhance\tools\FPGA_PIN_PLANNER | fpga_pin_planner.exe |
| CE_INSTALL | INSTALL_DIR\cadEnhance\tools\CE_INSTALL | ce_install.exe |


